
Schwinn Homegrown Model Identifier › Forums › General Stuff › Homegrown Talk › Starting restoration project 95 Homegrown FS *finished*
- This topic has 32 replies, 6 voices, and was last updated 7 years, 8 months ago by
ChattyMatty.
-
AuthorPosts
-
July 15, 2016 at 10:04 pm #1405
Yorktown
ParticipantFinally found a frame and now I’m going to have it painted before putting it together. I was looking at the available decals and it looks like the early bikes have different decals. Oh well, guess I’ll upgrade.
I’ll update this thread with progress photos as I work through the project. -Andrew
July 16, 2016 at 6:16 pm #4528moby
ParticipantOh boy those decals from the earlier homegrowns are tough to find. In the interest of preservation you might just consider a silicon based polish—you might be surprised how the finish can turn out with some modern chemicals. But nothing abrasive, and be careful you don’t lift the edges. Those decals look like they’re in great shape.
The stencil logo was always my favorite, and I don’t think they used them after that intro year.
Upside to the fullies with the smaller pivot is you can rebuild it with pretty off-the-shelf stuff, if I recall correctly.
July 16, 2016 at 8:31 pm #4529ParticipantWell that’s a few recommendations to just clean it up and don’t repaint. I think that’s enough to convince me to do just that. I’ll get it polished up and see what it looks like. Photos to follow.
And you’re right moby the pivot is easy to find parts for and easy to rebuild. Amazon even carried the bearings. 6903RS for reference in case anyone needs the bearing number.
July 17, 2016 at 10:07 pm #4530livernose
ParticipantI’ve brought to life scratched up dull paint with Meguiars Scratch X 2.0 (clear coat scratch remover), staying away from the decals altogether. Try a small area and you will be surprised how well it does. Use just a very small amount of Scratch X at a time, and rub it hard. Followed by wax.
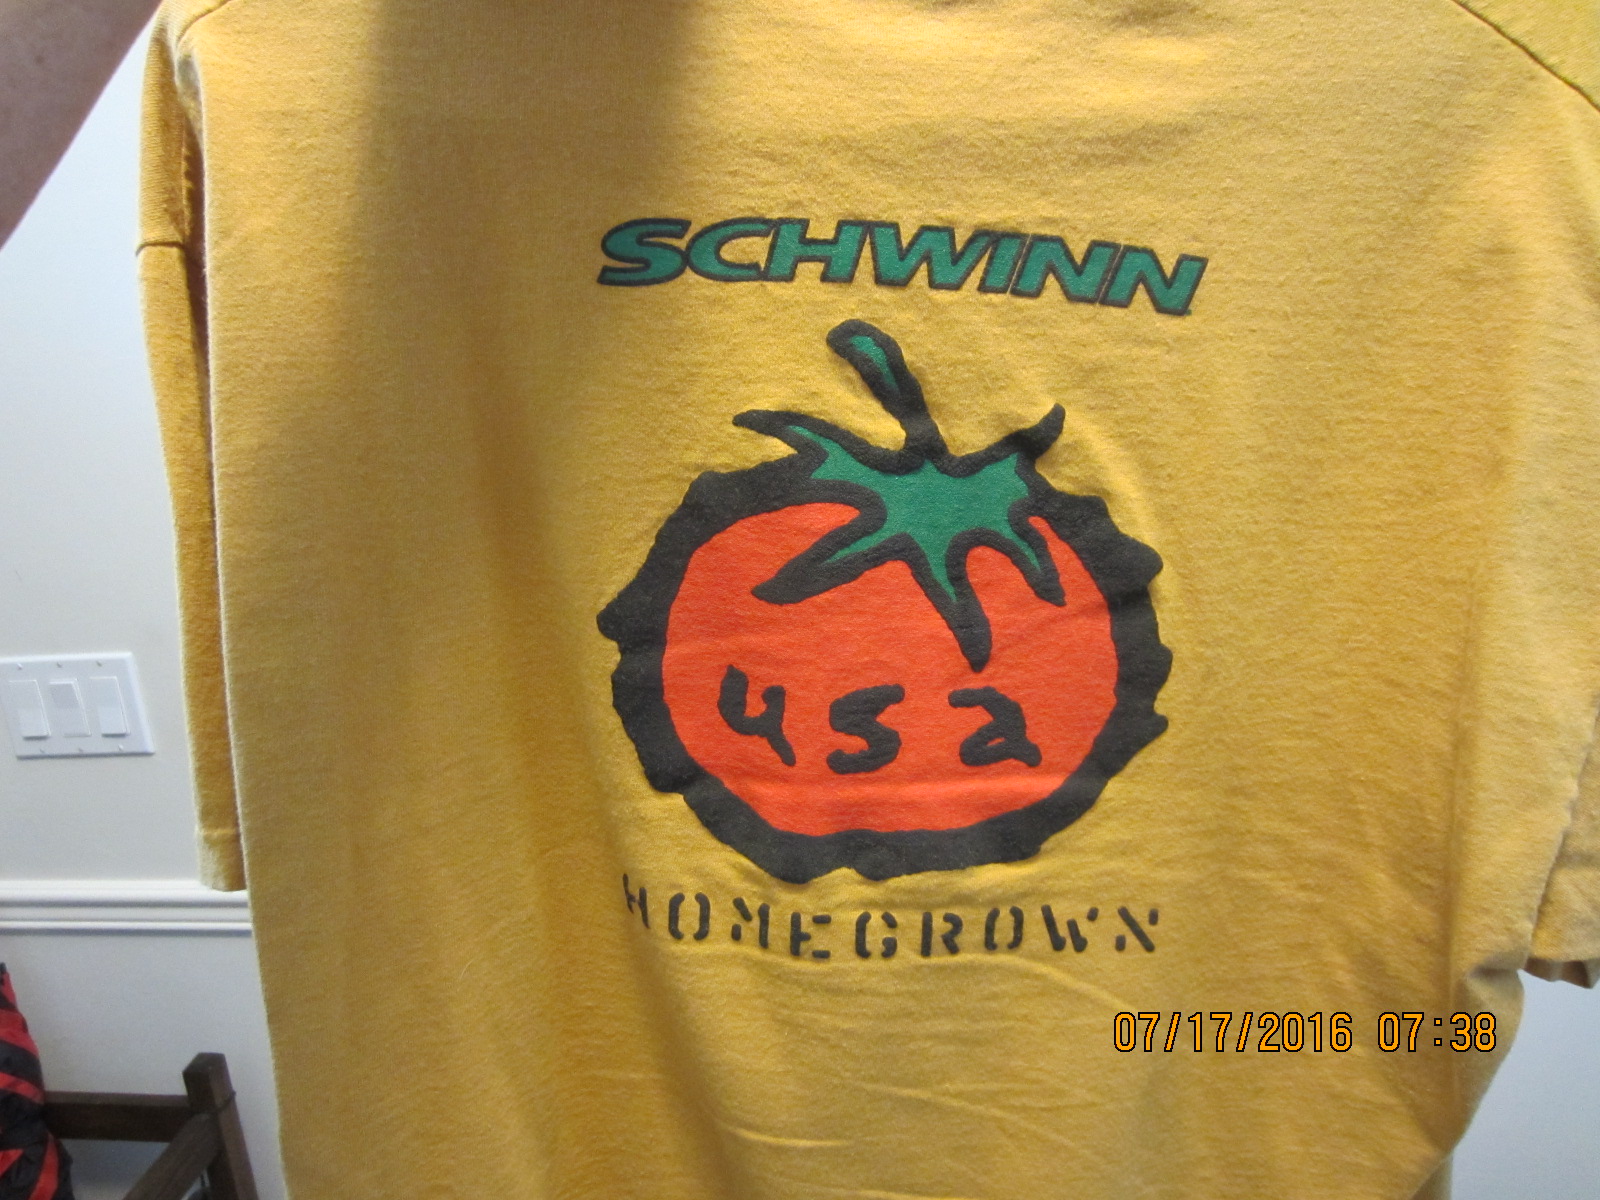
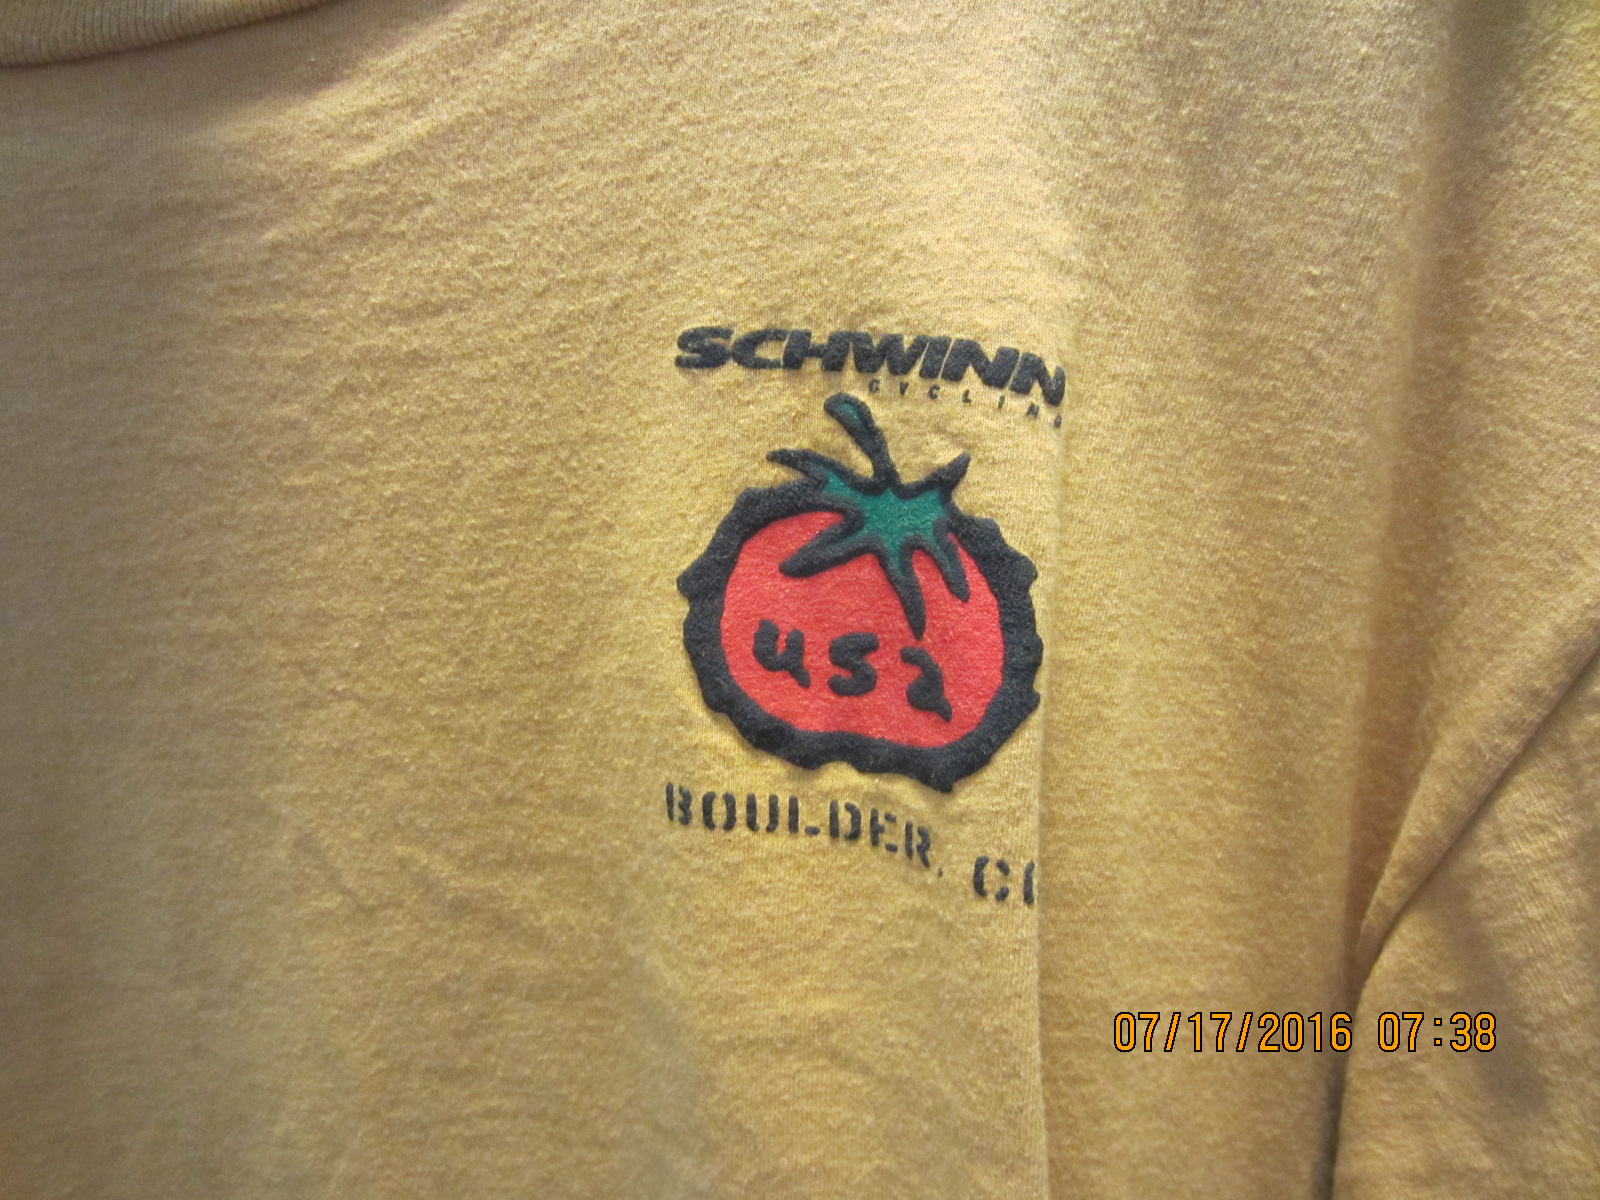
July 17, 2016 at 10:14 pm #4531ParticipantBTW, There may be some of those decals out there, but I’ve never seen them for sale anywhere. Definitely cool to preserve them on your frame. My favorite T shirt has that logo.
 July 18, 2016 at 1:57 am #4537Participant
Well now I need to find a matching T-shirt! 🙂 Polished it up with Meguiars cutting paste, followed by a few coats of Zaino car polish. Looks pretty good. After I get the new bearnings on Tuesday I’ll get it assembled and then I’ll post a few pictures.
July 18, 2016 at 3:02 am #4538CraigB
ParticipantCan’t wait to see the finished product!
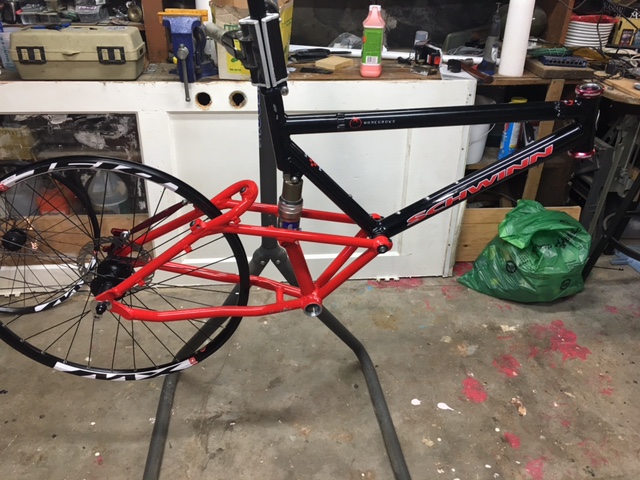
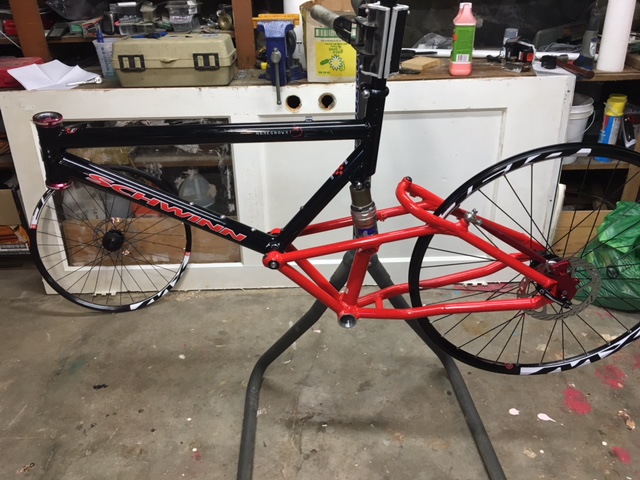
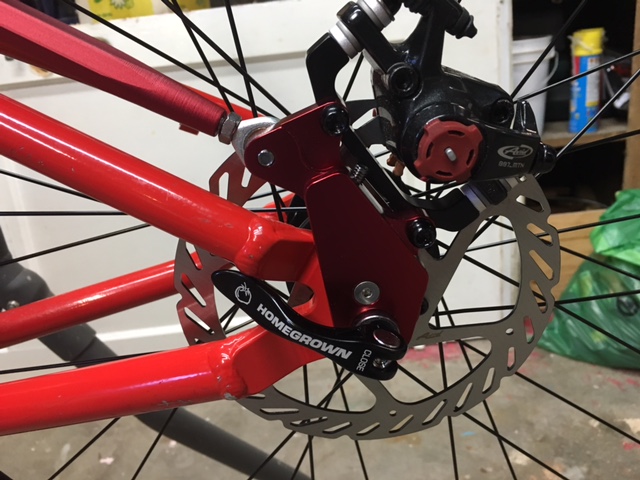
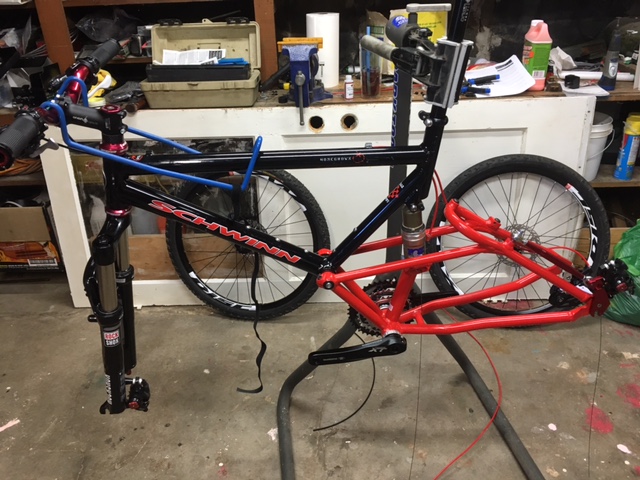
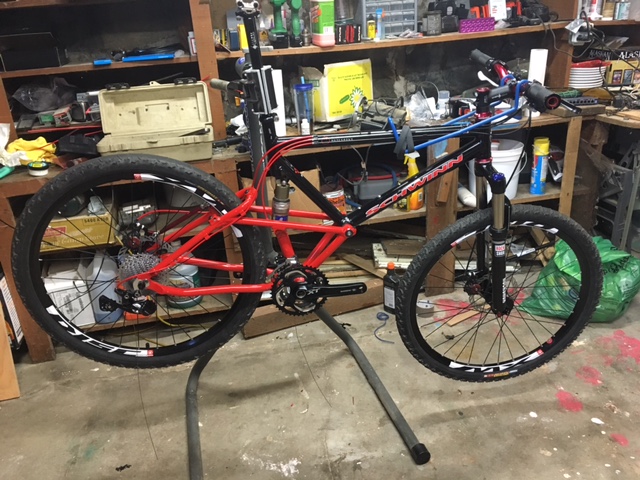
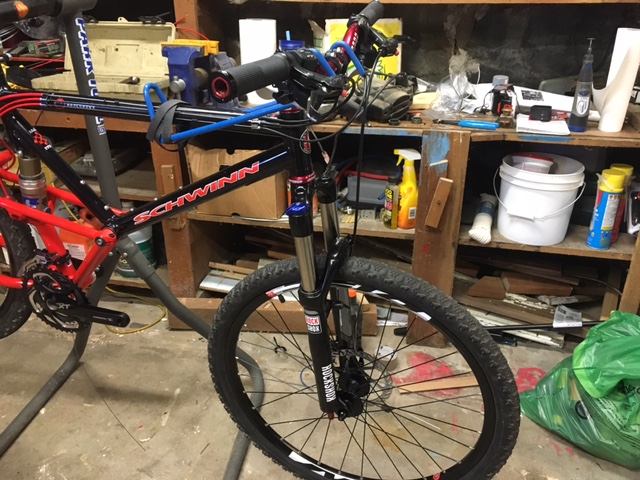
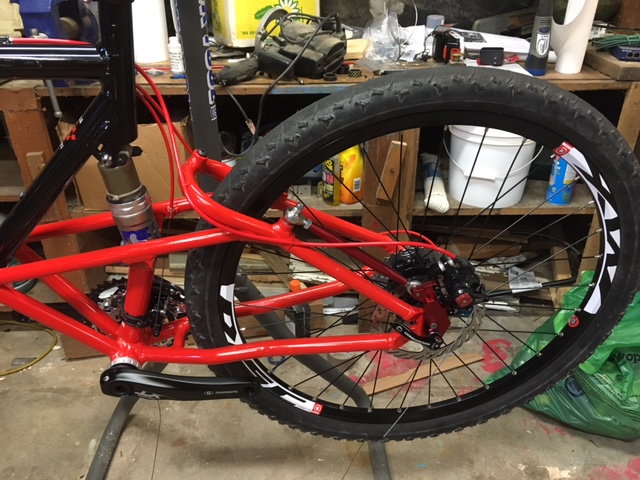
July 19, 2016 at 3:28 am #4542ParticipantFew photos of the cleaned up frame and test fitting the rear disc brake and wheel with STX hubs, my budget made this an easy choice ;-). Went with Avid BB7’s with Avid speed dial 7 levers. The rest of the components are Shimano XT 3×10.
If all goes to plan I should be able to take it out this weekend.
Taking the fork in tomorrow to get the tube cut down a bit at 10” it’s way too long. Just one fo those tools I just never got around to buying.
 July 19, 2016 at 3:56 am #4549Participant
Looks good. I like the skewers. Did you have to drill into the frame at all for the rear disc mount? Is the rear triangle paint or powder coat?
July 19, 2016 at 12:46 pm #4550ParticipantSkewers were an Ebay purchase. Yes I had to drill one hole but I reduced the requested size and used grade 5 hardware and a steel nut insert (for clearence) in place of the supplied screw. Still far more metal on this side than what’s on the derailler side so I wasn’t too worried about it.
Rear tirangle is original paint as far as I can tell. It’s rougher than the pictures make it out to be, but it looks good from about 5 feet away.
July 19, 2016 at 1:18 pm #4551ParticipantHaving disc brakes is worth drilling the hole. What is the rear disc set up called? Makes me want to try this on one of my hard tails.
July 19, 2016 at 1:27 pm #4552ParticipantGot it from an auction site (not sure if we can post links), but it’s supplied by Chasertech. There are several companies either reselling or making a version of this setup though. They all looked about the same. This one seems well made and the price was reasonable. Happy to offer my thoughts once I’ve got the bike going before you commit.
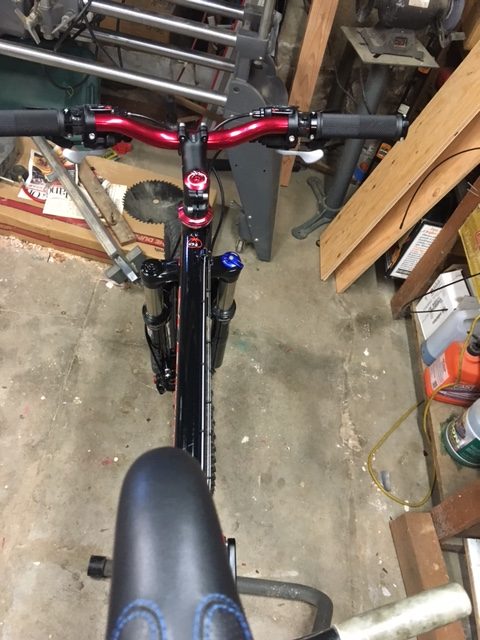
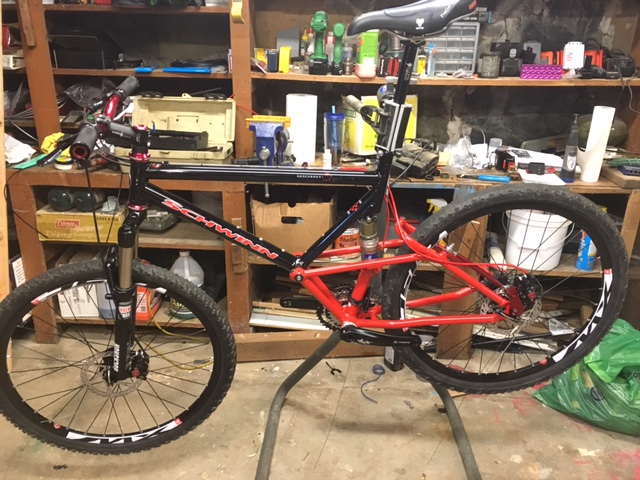
July 21, 2016 at 9:48 pm #4591ParticipantAlmost there. Just the chain, snip cables, and a major seat post trim.
 July 21, 2016 at 9:51 pm #4606Participant
😮 Looking great!
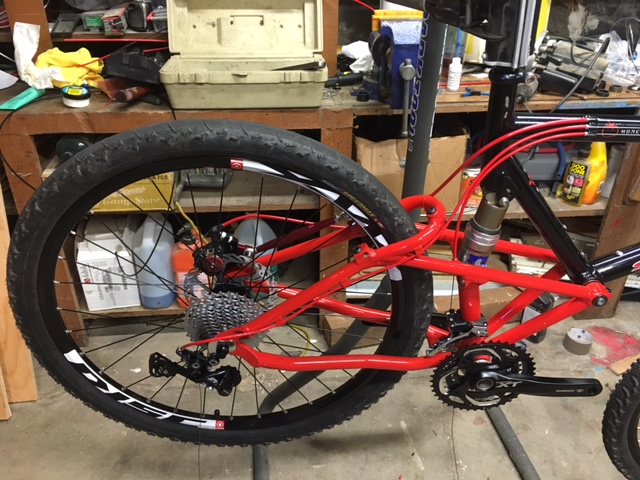
July 21, 2016 at 10:46 pm #4607ParticipantNice looking build. The red and black is a good color combination. Nice touch on the red cable housing in the back and black housing in front. What did you use to plug the drive side rear brake boss?
-
AuthorPosts
- You must be logged in to reply to this topic.